Showing posts with label Lessons. Show all posts

Tuesday, April 7, 2009

HOW TO MAKE A SILHOUETTE

SILHOUETTE
Most Muslims do not have pictures of their loved ones around their home or office. This is because of the ban on images of people and animals. We do have them but hidden away in albums, photo boxes and stored digitally.
Silhouettes are a great way to have a little reminder of our loved ones and they are easy to make.

MATERIALS


  1. Digital camera

  2. Computer

  3. Paper of different colors, prints and textures

  4. Drawing implements (pencils, rulers, erasers etc.)

  5. Scissors

  6. Little decorate collections of bits and pieces ( ribbons, buttons, rocks, shells etc)

  7. Picture frame

METHOD

  1. Select a theme. You can choose one them for your entire family or individual for each person. Play around with ideas before you start.

  2. Take a picture of the person's profile using your digital camera.


3. The load into your computer and print using Microsoft Office Picture Manager and WORD and resizing to a size that you would like. You do not need to print in full color. I used the draft preference.


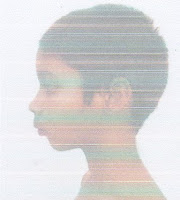
4. Use a pencil or marker to draw an outline around the image.


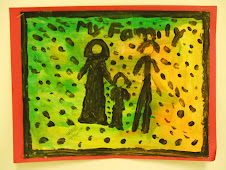
6. Cut out with a scissors and place on a piece of a paper which you have chosen for your silhouette. Trace out the template and cut out.

7.Now you are ready to decorate and design to your heart's desire. When your picture is finished place in a frame and hang in a chosen spot on your wall.


Have fun and be a s creative as you like!

Wednesday, January 23, 2008

Free clipart


I will be posting free images from time to time. Here's one of a masjid.

Friday, January 18, 2008

One Point Perspective

Perspective is a technique used on paper to create the illusion of three dimensional drawing in a picture or drawing.

One Point Perspective is when one vanishing point is used.

To draw a cube in 3D it quite easy and the steps are simple to follow. Make sure that you draw lightly so that your construction lines are easily erasable if and when you need to.

Step One: Draw a line border around your page/paper.

Step Two: Draw a horizontal line (blue line)across the top part of your paper.

Step Three: Add a point ( red dot) on the horizontal line 0n the right hand side of your paper. This point is the vanishing point.

Step Four: Draw a square in the lower left hand side of your paper.

Step Five: Draw lines (green lines)to the three corners of the square. These are construction lines. Step Six: Draw parallel lines (orange lines) to make two sides of the cube. now you should be able to see a cube. If your lines are not parallel the shape will be distorted. Step Seven: Now you can add color. It is important to use color in three values or shades. The square will have the darkest color because it is the closest to you. In perspective, the object or the part of the object that is the closet to you is the darkest color. Next the top will be the lightest because it is the most exposed part. and the remaining will be the middle shades.
Step Eight: To make the cube really look 3D you will have to add a shadow. In this case you can see that light is coming from the vanishing point so you will be adding the shadow from that point. Draw the shadow lines. (grey lines) Notice that one shadow line continues from one green line or one side of the cube and the other actually passes through the other corner/ angle of the cube.

Step Nine: fill in the shadow area with a medium shade of grey.

Step Ten: Erase or delete all construction lines except for the horizontal line. Attend to details and make sure all your lines are straight and colors are well placed.Step Eleven: Put in your background color which would be light and your foreground color which would be dark.

Tuesday, January 1, 2008

Drawing the Kaaba


This is a free lesson and must not to be reproduced or printed for commercial reasons without permission from the author of this blog. All rights reserved.

Step one - Draw a line across the bottom half of your paper. This your horizon line. It separates the foreground from the background.

Step Two - Draw a square making sure that most of the shape is above the horizon line. Step Three -Draw another square behind square number one, making sure that it finished below the horizon line and a little to the side.

Step four - Now join the two squares by drawing straight lines (red lines) from the four corners.Step Five -Draw four more straight lines (red lines). Two on the square number one and two on the side facing you in a slight angle.
Step six - To add the background, start by adding two horizontal lines (green lines) and drawing the tower.
Step seven - Next to draw the arches, draw some vertical lines (green lines).
Step eight - To complete the arches draw some slightly curved lines ( blue lines)
Step nine -You are ready to color. Color square number one with black leaving the space between the two red lines blank. Color the top space in a light brown or any other light color. Color the side in a medium grey. Color the band around the Kaaba in yellow.


Step ten - Add in the color for the sky. There is no need to add any cloud since this is the desert sky and it does not need clouds. You can add a little if you like. Add the color for the sand. It can range from light brown to ochre and with a little texture can really look nice. You can continue to add as much details as you like. Arabic can be added to the yellow band too. Have fun!!!

Sunday, December 30, 2007

How to draw the head of a girl wearing Hijab.

This is a free lesson and must not to be reproduced or printed for commercial reasons without permission from the author of this blog. All rights reserved.


Step one – Always draw as lightly as you can so that you can
erase without a mess. Draw an oval. This is the skull.


Step two – Draw another oval. This will be the face.

Step three – Add the shape of a cylinder to form the neck.


Step four - Draw a line (red line) where the two ovals divide each other. This is where the eyes will be.


tep five – Draw another line (red line) below the first. This is where the nose will be.


Step six – Draw another line (red line) below. This will be where the mouth will be.


Step seven – Draw the face (green line) using the red lines to guide you.


Step eight – Next, draw a line (green lines)to form the neck line
and the Hijab at the back of the head.


Step nine – Now draw a line (green lines)to join up and make the bottom of the Hijab.


Step ten – To finish forming the Hijab, draw lines (blue lines) from the top of the head to the neck and across the forehead. Erase any lines which might protrude out of the face or else where.

Step eleven – Color in the face using a color you like.


Steps twelve – Color fill the forehead part of the Hijab with another color that you chose.
Step thirteen – Color in the shawl.


Step fourteen – Add any decorative designs you would like.
Step fifteen – Add a background.
Now you have completed a silhouette of a Muslima!
Experiment with designs and colors to make some very interesting pictures.Alhamduillah! After some practise you should be able to draw a head without all the construction steps.