I will be posting free images from time to time. Here's one of a masjid.

Step One: Draw a line border around your page/paper.
 Step Two: Draw a horizontal line (blue line)across the top part of your paper.

Step Four: Draw a square in the lower left hand side of your paper.
 Step Five: Draw lines (green lines)to the three corners of the square. These are construction lines.
 Step Six: Draw parallel lines (orange lines) to make two sides of the cube. now you should be able to see a cube. If your lines are not parallel the shape will be distorted.
 Step Seven: Now you can add color. It is important to use color in three values or shades. The square will have the darkest color because it is the closest to you. In perspective, the object or the part of the object that is the closet to you is the darkest color. Next the top will be the lightest because it is the most exposed part. and the remaining will be the middle shades.
 Step Eight: To make the cube really look 3D you will have to add a shadow. In this case you can see that light is coming from the vanishing point so you will be adding the shadow from that point. Draw the shadow lines. (grey lines) Notice that one shadow line continues from one green line or one side of the cube and the other actually passes through the other corner/ angle of the cube.
Step Nine: fill in the shadow area with a medium shade of grey.
 Step Ten: Erase or delete all construction lines except for the horizontal line. Attend to details and make sure all your lines are straight and colors are well placed.
 Step Eleven: Put in your background color which would be light and your foreground color which would be dark.


Many Islamic artistic expressions were done in intricate patterns and exquisite geometric designs. Math is the tool that is used to create such beautiful eyefuls.Today many are using this most famous aspect of Islamic art to teach algebra, geometry and calculus of Math in classrooms and colleges. It provides an exciting medium to an otherwise “boring” topic. Radial, symmetry and tessellation can provide an easy way for students to learn about these concepts in Math.
You can check out this book;Geometric Concepts in Islamic Art (Paperback)by Issam El-Said (Author), Ayse Parman (Author)
Links to check out how it is done.1. http://www.collegenews.org/x4595.xml2. http://homeschoolmath.blogspot.com/2007/02/geometric-patterns-in-islamic-art.html3. http://www.mtholyoke.edu/offices/comm/news/summermath.shtml4. http://www.artteacherconnection.com/pages/anrtandmath.htm5. http://mtcs.truman.edu/~thammond/history/Art.html6. http://www.vam.ac.uk/school_stdnts/schools_teach/teachers_resources/maths/index.html
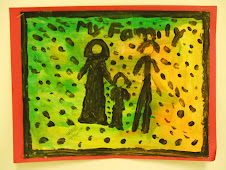
 Images can be very influential and no where is that more obvious than when I am praying. First I make sure that my environment is clean, I make wudu, check my clothes to see if they are clean and cover me well. Then I lay down my prayer mat and pray. Easy right?


Step one - Draw a line across the bottom half of your paper. This your horizon line. It separates the foreground from the background.
Step Two - Draw a square making sure that most of the shape is above the horizon line.  Step Three -Draw another square behind square number one, making sure that it finished below the horizon line and a little to the side.
 Step four - Now join the two squares by drawing straight lines (red lines) from the four corners.
 Step Five -Draw four more straight lines (red lines). Two on the square number one and two on the side facing you in a slight angle.
 Step six - To add the background, start by adding two horizontal lines (green lines) and drawing the tower.
 Step seven - Next to draw the arches, draw some vertical lines (green lines).
 Step eight - To complete the arches draw some slightly curved lines ( blue lines)
 Step nine -You are ready to color. Color square number one with black leaving the space between the two red lines blank. Color the top space in a light brown or any other light color. Color the side in a medium grey. Color the band around the Kaaba in yellow.